


There’s nothing quite like the brilliant gleam of polished chrome trim. Unless, of course, you prefer a different look. While the glint of chrome plated bumpers and trim has long been a hallmark of American classics, painted accents serve as a powerful counterpoint to this aesthetic. Body-colored bumpers, for example, can lend a modern, integrated appearance to an older vehicle. Blacked-out window trim often yields a more performance-oriented look, with the very real benefit of eliminating unwanted glare and reflections.
The very quality that makes chrome so desirable – a nearly impervious, glass-smooth finish – makes it nearly impossible to paint properly. For paint to adhere to any surface requires a degree of “toothiness” for the paint material to lock onto when it cures. Before a piece of metal trim is chrome plated, it is usually finely polished first. This alone reduces the metal’s tooth. But the chrome surface, once plated, is also exceptionally hard, making it difficult to add tooth back with abrasives.
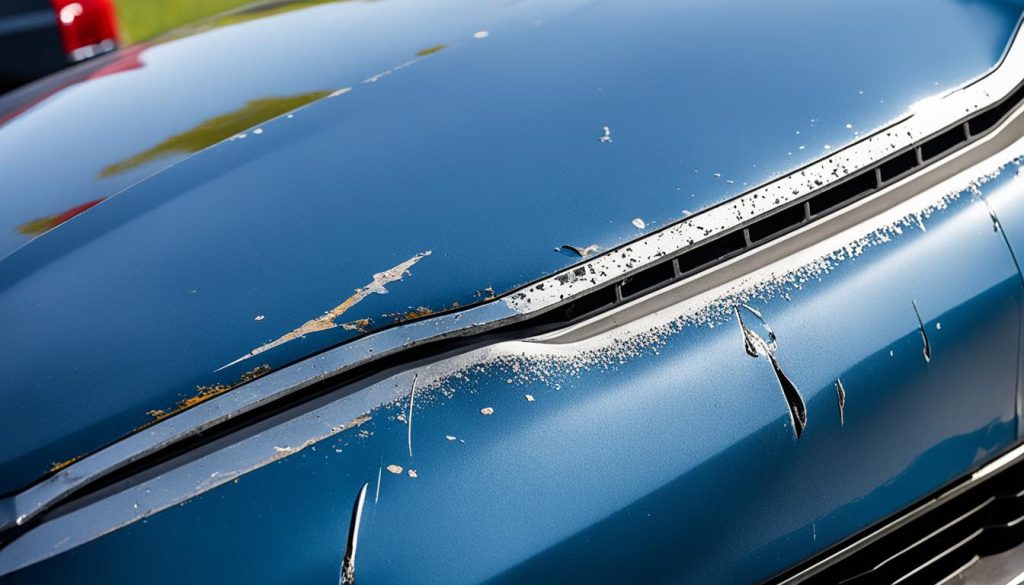
That said, it is possible to paint over existing chrome. However, it requires patience and more than just a casual hit of spray paint if you want it to last. To demonstrate the process, we grabbed a chrome-plated valve cover we had laying around and went to work. Importantly, the chrome itself was in great shape with no pits or peeling. We masked each step as we went along to show the progression.
The Process
Preparation
Start by washing, drying, and degreasing the part. We recommend a prep solvent like Eastwood Pre Painting Prep to ensure all oily residues are removed. Avoid using parts with pitted or peeling chrome plating if possible. These flaws may not allow the paint to adhere properly and will likely show through the paint anyway.

Scuffing
Using a coarse grade of sandpaper (between 120- and 220-grit), sand all surfaces where paint will be applied. If you have larger, flatter surfaces, you can use a DA sander. For smaller trim or more intricate surfaces, hand-sand in a crosshatch pattern. Sand the chrome until the surface is evenly and thoroughly scuffed, paying close attention to corners and recessed areas. Wipe the entire part with prep solvent to remove any sanding residue.

Priming
A self-etching primmer will ensure the best adhesion between the scuffed chrome and the paint. We recommend a catalyzed two-component (2K) epoxy primer for best results. Apply at least two coats of primer to ensure full coverage and allow to cure for 24 hours before continuing. If you see sanding marks through the primer, apply another coat or two and allow to cure again for 24 hours. It’s critical that the primer fully cure before paint is applied.

Painting
Once the primer has cured, painting the part is essentially the same as painting any other part. Scuff lightly if the primer has cured for more than 48 hours. Spray your paint in multiple light coats, building up as many layers as possible without losing details. Allow each coat to dry completely before proceeding to the next. Depending on the desired finish, clearcoat can be applied on top of the base color, but we recommend a minimum of two color coats.

Finishing
For many applications (black-out trim especially) no further work will be required after the paint cures. However, if you’re color-matching or have clearcoat, you may wish to cut, polish, and buff like you would a body panel. Use extreme caution not to overwork anything painted over chrome, hand polishing wherever possible.
The Garage™
#Paint #Chrome