


How to diagnose and fix a gas gauge not working or wrong condition
How a gas gauge works
In older pre-computer days, the gas gauge connected directly to the 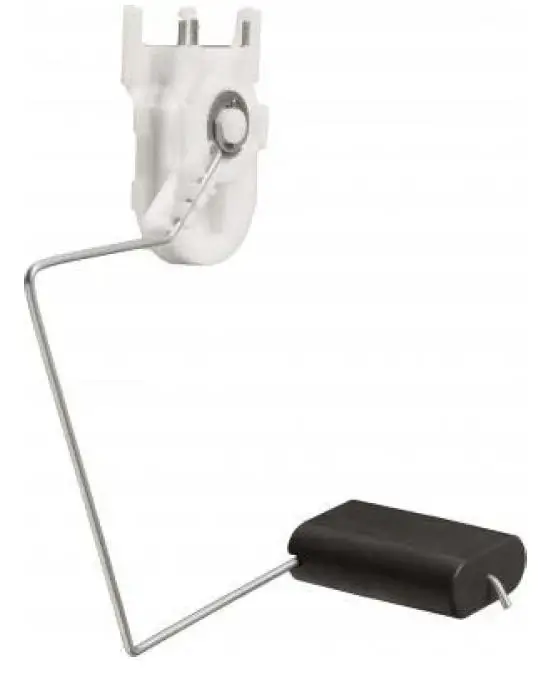 fuel sending unit in the tank. The instrument cluster sent a 12-volt signal to the sending unit and the sending unit returned a varying return voltage based on the level of fuel in the tank. The sensor in the tank is simply a variable resistor with a wiping arm that moves in an arc by the float and float arm.
In most modern vehicles however, it’s the body control module (BCM) or Engine Control Module (ECM) that sends a voltage to the the fuel sending unit and reads the return signal. The BCM then communicates fuel level to the gas gauge using digital communication.
What are the most common causes of the gas gauge not working or wrong?
In most cases, the cause on incorrect gas gauge reading is a bad electrical connection between the gas gauge and fuel sending unit or a bad connection between the BCM and the fuel sending unit. However, a faulty sending unit can also cause the gauge to not read or all or report incorrect fuel levels.
What causes the fuel gauge to read empty when the tank is full?
• Float has separated from the flow arm
• Sensor is corroded
• Sensor wires are corroded in the connector
What causes the fuel gauge to read full when the tank is empty?
• Short to return signal in the wiring harness
What causes the fuel gauge to fluctuate?
• Float arm is binding
• Anti-slosh Baffle in tank has broken loose
Testing the gas gauge and fuel sending unit
Consult a shop manual for the exact testing procedure for your vehicle. Here is one example for a 2013 Chevrolet Avalanche
When the fuel tank is full (float arm in the full up position), the sensor resistance is low, so the ECM sees a low signal voltage. When the tank is empty (float arm in full down position), the sensor resistance is high and the ECM sees a high signal voltage.
You can test the resistance by disconnecting the fuel sending unit at the connector above the fuel tank
With the ignition off and your meter set to the Ω scale, connect your meter leads to the fuel sending unit and ground. Look for less than 1.0Ω between the low reference terminal and ground. If the result is higher, check the reference circuit for an open or high resistance connection.
You can also install a variable resistor in place of the fuel sending unit to check the integrity of the wiring harness, BCM and gauge. Simple connect a gas gauge testing tool like this in place of the fuel sending unit. Then rotate the dial to change the resistance and read the gas gauge to see if it moves in the same amount.

©, 2023 Rick Muscoplat
Posted on by Rick Muscoplat
#Gas #Gauge #working #wrong #Ricks #Free #Auto #Repair #Advice #Ricks #Free #Auto #Repair #Advice